Bushnell Scope Adjustment Instructions: A Comprehensive Guide
Navigating the world of precision shooting demands a properly adjusted optic; this guide empowers users to expertly calibrate their Bushnell scopes for optimal performance and accuracy.
Understanding Your Bushnell Scope
Before diving into adjustments, familiarize yourself with the core principles of your Bushnell scope. These optical instruments utilize lenses to magnify targets and a reticle for precise aiming. Understanding how these components interact is crucial for effective adjustment.
Bushnell offers a diverse range of scopes, each designed for specific applications – from hunting and target shooting to tactical scenarios. Recognizing your scope’s intended purpose will guide your adjustment strategy.
Key features include magnification, objective lens diameter, and reticle type. Magnification determines how much closer the target appears, while the objective lens impacts light gathering. The reticle, often featuring markings for bullet drop or windage, aids in accurate shot placement.
Furthermore, knowing whether your scope is first focal plane or second focal plane impacts reticle adjustments at varying magnifications.
Identifying Scope Components
A Bushnell scope comprises several key components essential for accurate adjustments. The adjustment knobs – windage and elevation – control reticle movement, impacting point of impact. These are typically marked with click values, indicating how much the reticle shifts per click.
The objective lens gathers light, while the eyepiece focuses the image for your eye. The tube houses the internal optics, and the reticle provides the aiming point.
Many scopes feature a parallax adjustment, eliminating image shift at varying distances. Some also include a fast focus eyepiece for quick image clarity.
Identifying these components and their functions is paramount. Locate the windage and elevation knobs, understand their click values, and familiarize yourself with the parallax adjustment if present. Knowing your scope’s anatomy will streamline the adjustment process and ensure optimal performance.
Types of Bushnell Scopes & Adjustments
Bushnell offers a diverse range of scopes, each with unique adjustment features. Traditional scopes utilize manual adjustment knobs for windage and elevation, offering precise control. Digital scopes, like the Yardage Pro series, incorporate electronic adjustments and often feature pre-programmed ballistic profiles.
Some scopes boast side parallax adjustment, while others have it on the objective lens. BDC (Bullet Drop Compensation) reticles simplify holdovers for varying distances, requiring minimal adjustment.
Adjustment increments vary; common values include 1/4 MOA or 1/2 MOA per click. Understanding your specific scope’s adjustment type and click value is crucial.
Laser scopes, such as the Burris 4-1242, offer a different adjustment approach, relying on laser ranging and ballistic calculations. Always consult your scope’s manual to determine its specific adjustment capabilities.

Initial Scope Setup & Mounting
Securely mounting your Bushnell scope is paramount; proper installation and positioning establish a stable foundation for accurate adjustments and consistent shooting performance.
Proper Scope Mounting Techniques
Achieving a rock-solid mount is the cornerstone of accurate shooting. Begin by ensuring your rifle’s receiver is properly prepared, free from burrs or debris. Select rings appropriate for your scope’s objective lens diameter and rifle’s rail type – dovetail, Picatinny, or Weaver.
Torque the ring screws gradually and in a crisscross pattern, adhering strictly to the manufacturer’s specified torque values. Over-tightening can distort the rings and scope tube, while under-tightening leads to shifting during recoil.
Use a quality level to verify the scope’s reticle is vertically aligned with the rifle’s bore. Shim the rings if necessary to correct any cant. Double-check all screws after the first range session, as settling can occur. A stable mount minimizes the need for frequent re-zeroing and maximizes your scope’s potential.
Eye Relief and Scope Positioning
Proper eye relief is crucial for a full field of view and to avoid dangerous scope strike. Eye relief is the distance between your eye and the scope’s eyepiece when maintaining a clear sight picture. Bushnell scopes offer varying eye relief depending on magnification and model.
Position the scope so you achieve consistent eye relief across the entire magnification range. Adjust the scope’s fore/aft position within the rings to optimize this. A comfortable and repeatable head position is essential.
Insufficient eye relief can result in a dark vignette or, in severe cases, a painful impact from the scope during recoil. Ensure ample space exists, especially with high-powered rifles. Correct positioning enhances accuracy and shooter safety.
Bore Sighting: The First Step
Before live fire, bore sighting dramatically reduces wasted ammunition and accelerates the zeroing process. This involves aligning the scope’s reticle with the rifle’s bore, ensuring they point at the same location.
Utilize a bore sighter – either an optical or laser model – inserted into the rifle’s barrel. Look through the scope and adjust the windage and elevation knobs until the reticle matches the bore sighter’s reference point. Alternatively, remove the bolt and visually align the bore with a distant target through the scope.
Bore sighting gets you “on paper,” but it’s not a substitute for live-fire zeroing. It’s a preliminary step, providing a close starting point for fine-tuning adjustments at the range.
Windage and Elevation Adjustments
Precise shot placement relies on mastering windage and elevation; these adjustments correct for bullet drift and trajectory, ensuring accuracy at varying distances.
Understanding Windage Adjustment
Windage adjustment compensates for the effect of wind on your bullet’s flight path, as well as any inherent drift caused by minor imperfections in the rifle or ammunition. Essentially, it moves the point of impact left or right. The windage knob, typically located on the side of the scope, is marked with directional arrows – ‘L’ for left and ‘R’ for right.
Each click of the windage knob corresponds to a specific movement of the reticle, usually measured in Minutes of Angle (MOA) or millimeters at 100 meters. Knowing your scope’s click value is crucial for accurate adjustments. For example, a 1/4 MOA click will move the impact point 1/4 inch at 100 yards.
Understanding prevailing wind conditions is paramount. Estimating wind speed and direction allows you to proactively adjust the windage to counteract its influence, keeping your shots on target. Consistent practice and observation are key to mastering this skill.
Understanding Elevation Adjustment
Elevation adjustment corrects for bullet drop, the downward pull of gravity as the bullet travels towards the target. This is particularly important at longer distances where bullet drop becomes significant. The elevation knob, usually positioned on top of the scope, controls vertical reticle movement. Like windage, it features directional markings, typically ‘U’ for up and ‘D’ for down.
Similar to windage, each click of the elevation knob represents a specific adjustment value, commonly expressed in Minutes of Angle (MOA) or millimeters. A 1/4 MOA click will shift the impact point 1/4 inch vertically at 100 yards. Accurate elevation adjustments require knowledge of your scope’s click value and the ballistic characteristics of your ammunition.
Factors like distance, bullet weight, and velocity all influence bullet drop, necessitating precise elevation adjustments for consistent accuracy.
Using the Adjustment Knobs
Bushnell scope adjustment knobs are designed for precise reticle movement, enabling accurate zeroing and adjustments for varying distances and wind conditions. Before making adjustments, understand your scope’s click value – typically 1/4 MOA or 0.1 Mil-Rad per click. Rotate the knobs in the indicated direction (Up/Down for elevation, Left/Right for windage).
Most knobs feature audible and tactile clicks, providing feedback for each adjustment. Keep a record of your adjustments to avoid confusion and facilitate returning to your original zero. Avoid forcing the knobs; if resistance is felt, ensure you’re turning in the correct direction.
Remember to adjust one setting at a time, observing the impact on the target before making further changes. Consistent, small adjustments yield the best results.

Zeroing Your Bushnell Scope
Achieving a precise zero is crucial for accuracy; this process involves adjusting the scope until the point of impact matches your desired point of aim consistently.
Choosing a Suitable Zeroing Distance
Selecting the right zeroing distance is paramount for effective long-range shooting and minimizing bullet drop compensation. A common and versatile choice is 100 yards, offering a good balance between practicality and ease of adjustment for most common shooting scenarios. However, your ideal distance depends heavily on your intended use.
For primarily short-range applications, like hunting within dense woods or competitive shooting at closer targets, a 50-yard zero might be preferable. Conversely, if you anticipate frequent long-range engagements, a 200-yard or even 300-yard zero could be more beneficial, reducing the amount of elevation adjustment needed at extended distances.
Consider the ballistic characteristics of your ammunition. Heavier bullets generally require different zeroing distances than lighter ones. Ultimately, the best zeroing distance is the one that allows you to make the fewest adjustments for your typical shooting conditions and target ranges, maximizing accuracy and simplifying your shooting process.
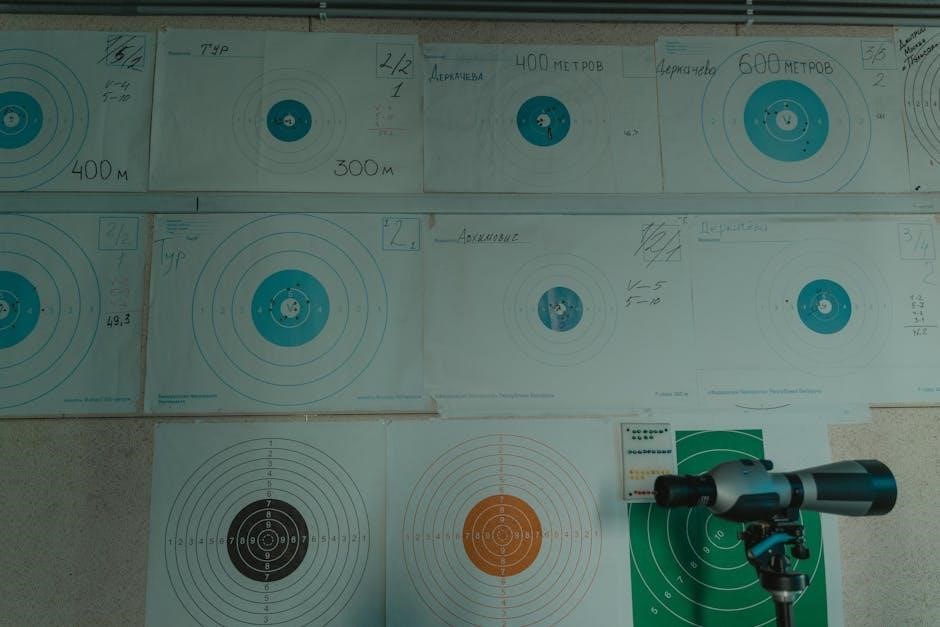
The Zeroing Process: Step-by-Step
Begin by securing your rifle in a stable shooting rest to eliminate human error. Fire a three to five-shot group at your chosen zeroing distance – typically 100 yards. Carefully observe the group’s center relative to the target’s center. If the group is consistently high or low, adjust the elevation knob accordingly, using the scope’s click value to move the point of impact.
Next, address windage. If the group is left or right of the target center, adjust the windage knob in the appropriate direction. Make small, incremental adjustments – one or two clicks at a time – and fire another group after each adjustment. Repeat this process, refining both elevation and windage, until your shots consistently group tightly around the desired point of impact.

Record your adjustments for future reference and ensure all screws are tightened after completing the zeroing process.
Grouping and Fine-Tuning Zero
Consistent grouping is paramount for accurate zeroing. After initial adjustments, focus on minimizing group size rather than chasing the absolute center of the target. Tight groupings indicate a stable platform and consistent shooting technique, allowing for precise adjustments. Analyze your groups – are they vertically or horizontally dispersed? This reveals whether elevation or windage requires further attention.
Make small, incremental adjustments – often just one click at a time – and fire another group. Observe the shift in impact and continue refining until your groups are consistently tight and centered. Don’t overcorrect; patience is key. Remember to account for any environmental factors, like wind, that might influence shot placement.
Document each adjustment to track progress and confirm a stable zero.

Advanced Adjustment Techniques
Mastering long-range shooting requires compensating for bullet drop and wind drift; utilizing ballistic reticles and precise adjustments unlocks superior accuracy and extended effective range.
Adjusting for Bullet Drop

Bullet drop is the vertical descent of a projectile due to gravity over distance. Understanding and compensating for this phenomenon is crucial for accurate long-range shooting. Bushnell scopes often feature adjustments, either through calibrated turrets or ballistic reticles, designed to counteract bullet drop.
To adjust for bullet drop, first, determine the bullet’s ballistic coefficient, weight, and muzzle velocity. Utilize a ballistic chart or application to estimate the drop at various ranges. Then, using the elevation adjustment knob on your scope, dial in the appropriate amount of “up” adjustment, corresponding to the calculated drop for the desired distance.
Alternatively, many Bushnell scopes incorporate ballistic reticles with markings indicating holdover points for different ranges. By simply aiming at the appropriate reticle mark, you can compensate for bullet drop without adjusting the turrets. Remember to practice and verify your adjustments to ensure accuracy in the field. Consistent practice builds confidence and proficiency.
Adjusting for Windage at Long Range
Wind significantly impacts bullet trajectory, causing lateral deviation known as wind drift. Accurately estimating wind speed and direction is paramount for long-range precision. Bushnell scopes allow for windage adjustments to counteract this effect, ensuring your shots land on target.

Begin by assessing wind conditions – flags, mirage, and vegetation movement are helpful indicators. Estimate the wind speed in miles per hour (MPH) and determine its angle relative to your shooting direction. Utilize a wind drift chart or ballistic calculator to determine the necessary windage correction in minutes of angle (MOA).
Employ the windage adjustment knob on your Bushnell scope to dial in the calculated correction. A rightward adjustment compensates for a crosswind pushing the bullet left, and vice versa. Remember that wind is rarely constant; continuous observation and minor adjustments are often required. Practice in varying wind conditions to refine your estimation skills and achieve consistent accuracy.
Using Ballistic Reticles
Bushnell ballistic reticles offer a sophisticated method for compensating for bullet drop and wind drift without turret adjustments. These reticles feature markings – dots, hashes, or Mil-dots – calibrated for specific ammunition and ranges.
Before utilizing a ballistic reticle, understand its calibration. Most are designed for a particular cartridge and velocity; confirm compatibility with your load. The reticle’s markings indicate where your bullet will impact at various distances, accounting for gravity and air resistance.
To use the reticle, estimate the range to your target. Then, hold on the corresponding reticle marking for that distance. For example, if your target is at 600 yards and the 600-yard mark is the third Mil-dot down, aim at that dot. Ballistic reticles also aid in windage correction; use the horizontal markings to compensate for crosswinds. Practice is crucial to mastering this technique and achieving accurate shots.

Troubleshooting Common Adjustment Issues
Addressing inconsistencies is vital for accuracy; this section details solutions for zeroing difficulties, click value discrepancies, and understanding parallax adjustments effectively.
Difficulty Achieving Zero
Struggling to achieve a consistent zero is a common frustration, often stemming from several factors. First, meticulously re-examine your initial mounting process, ensuring the scope is securely fastened and hasn’t shifted during firing. Confirm proper bore sighting was completed as a foundational step.
Next, scrutinize your shooting technique – inconsistent cheek weld, trigger pull, or breathing can significantly impact grouping. Utilize a stable shooting platform, like a benchrest, to eliminate human error.
Inspect ammunition; variations in bullet weight or velocity can cause shifts in point of impact. Finally, verify the adjustment knobs are functioning correctly and haven’t become stripped or loose. If problems persist, consider professional assistance to rule out internal scope issues or mounting problems.
Click Value Inconsistencies
Experiencing inconsistent click values during adjustments signals a potential problem requiring careful investigation. Ideally, each “click” should move the reticle a precise amount – typically ¼ MOA or 0.1 mil. If adjustments don’t correlate with expected reticle movement, first confirm you’re adjusting the correct knob (windage vs. elevation).
Ensure the scope isn’t damaged; a drop or impact can misalign internal components. Carefully observe the reticle movement with each click, noting any irregularities. Try adjusting in both directions to see if the inconsistency is consistent or variable.
If the issue persists, avoid further adjustments and consider professional inspection. Internal damage or a faulty adjustment mechanism may necessitate repair or replacement. Do not attempt to disassemble the scope yourself, as this will likely void any warranty.
Parallax Adjustment Explained
Parallax error occurs when the target image isn’t focused on the same plane as the reticle, causing inaccurate shots, especially at varying distances. Bushnell scopes often feature a parallax adjustment, typically a side focus knob, to eliminate this error.
To adjust parallax, focus on a target at your desired shooting distance. Rotate the parallax knob until the target image is sharp and the reticle remains stationary when moving your head slightly left and right, or up and down. A clear, consistent reticle position indicates proper parallax adjustment.
Understanding your scope’s parallax setting is crucial for precision; Different distances require different settings; familiarize yourself with the markings on the parallax knob and adjust accordingly for optimal accuracy at various ranges.

Maintaining Your Bushnell Scope
Regular cleaning, proper storage, and occasional professional check-ups ensure your Bushnell scope retains its precision and delivers consistent, reliable performance for years to come.
Cleaning and Lubrication
Maintaining clarity is paramount for accurate shooting, necessitating regular cleaning of your Bushnell scope’s lenses. Utilize a specialized lens cleaning kit, avoiding harsh chemicals or abrasive materials that could damage the coatings. Begin by gently removing dust and debris with a blower or soft brush.
Subsequently, apply lens cleaning fluid to a microfiber cloth – never directly onto the lens – and wipe in a circular motion. For stubborn smudges, repeat the process with a fresh section of the cloth. Pay close attention to the objective and eyepiece lenses, as these accumulate the most grime.
Regarding lubrication, Bushnell scopes are generally sealed and do not require routine internal lubrication. Attempting to disassemble and lubricate the scope yourself can void the warranty and potentially compromise its waterproof integrity. If you suspect internal issues, it’s best to consult a qualified gunsmith or contact Bushnell’s customer support for professional assistance.
Storage and Protection
Proper storage significantly extends the lifespan and functionality of your Bushnell scope. When not in use, store the scope in a clean, dry environment, shielded from extreme temperatures and humidity. A padded case is highly recommended to prevent accidental impacts and scratches during transport or storage.
Consider utilizing lens covers to protect the objective and eyepiece lenses from dust, dirt, and potential damage. If storing the firearm with the scope mounted, ensure the case provides adequate clearance to avoid pressure on the scope’s adjustments.
Avoid prolonged exposure to direct sunlight, as this can degrade internal components and potentially damage the reticle. Regularly inspect the scope for any signs of damage, such as loose screws or cracked lenses. Promptly address any issues to maintain optimal performance and prevent further deterioration. Careful handling and storage are key to preserving your investment.
When to Seek Professional Adjustment
Despite diligent efforts, certain situations necessitate professional scope adjustment. If you consistently struggle to achieve or maintain zero, even after meticulously following the adjustment procedures, a qualified gunsmith or optics technician should be consulted. Internal component issues, such as a damaged internal adjustment mechanism, may be present.
Similarly, if you notice significant click value inconsistencies – where adjustments don’t correspond to the expected movement of the reticle – professional intervention is crucial. Do not attempt to disassemble the scope yourself, as this will likely void any warranty and could cause irreparable damage.
Furthermore, if you suspect internal damage from a drop or impact, or if you’re uncomfortable with the adjustment process, seeking expert assistance is the prudent course of action. A professional can diagnose the problem accurately and restore your scope to optimal functionality.